Your making that list and checking it twice. Well, the time has come and you filled out all the necessary camper forms and now it is time to pack. But where do you begin? Maybe this is your first time packing your kid for a summer camp or maybe you didn’t feel like you had it all together last time. It can seem REALLY overwhelming. No fear! Here are some tips to help make great memories.
GETTING STARTED
Let’s start with the most obvious resource in your quest to pack and that is the camp provided packing list. Start looking at this early in case you need to order any items ahead of time. Your camp has scheduled activities already in place and they have provided this list to help your packing be a success. Whether your camper needs a pair of pants to go horseback riding or an old shirt and shorts for going into a mud pit that you will for sure never want again. So go ahead and print that out and start checking items off your list. You may also want to pay close attention to the items that the camp does not want you to bring like video games, cell phones, and iPads.
So you looked over the list but you still feel like you are missing something. Your camping list may or may not include everything you would want to pack so here is a more comprehensive list. Keep in mind that less is more. You don’t want your child to stress out about keeping track of all of his/her items instead of having fun and you don’t want them swimming in a sea of stuff and can’t find anything. Easier said than done coming from the queen of over-packing!
LABEL EVERYTHING
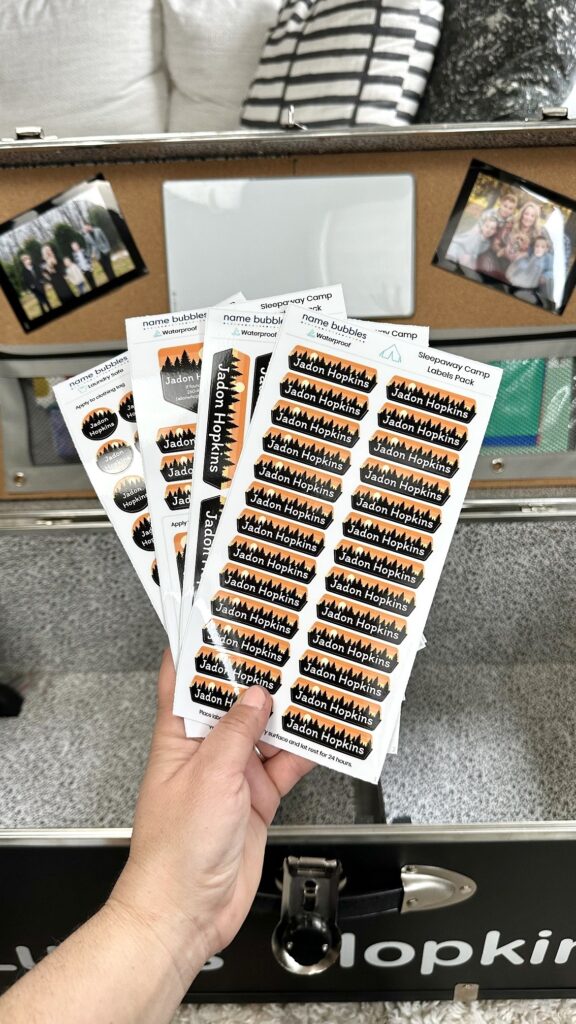
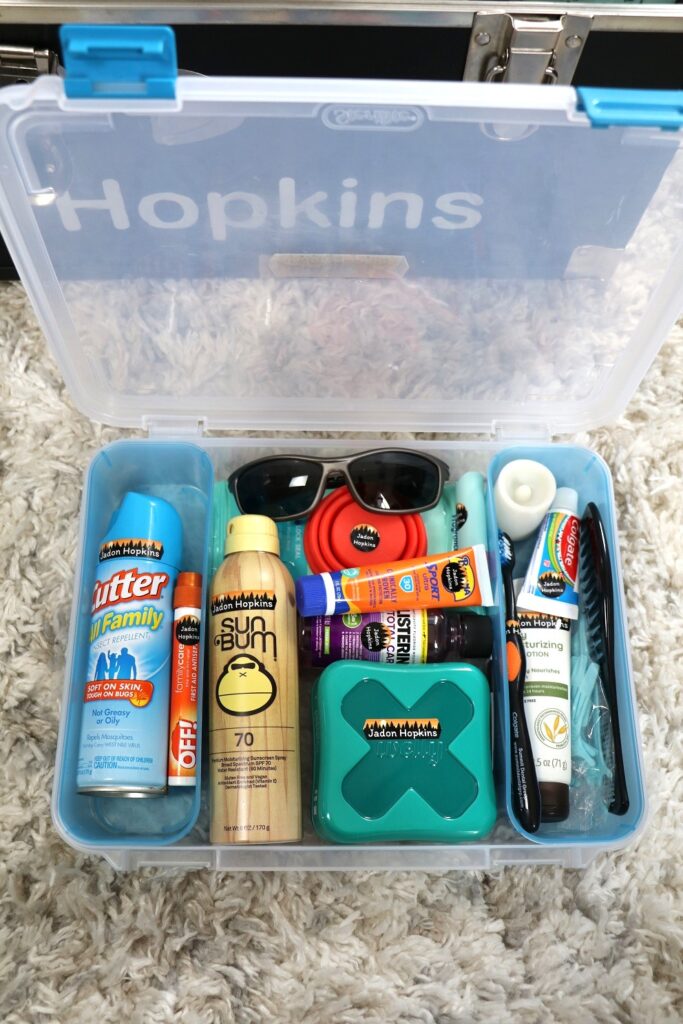
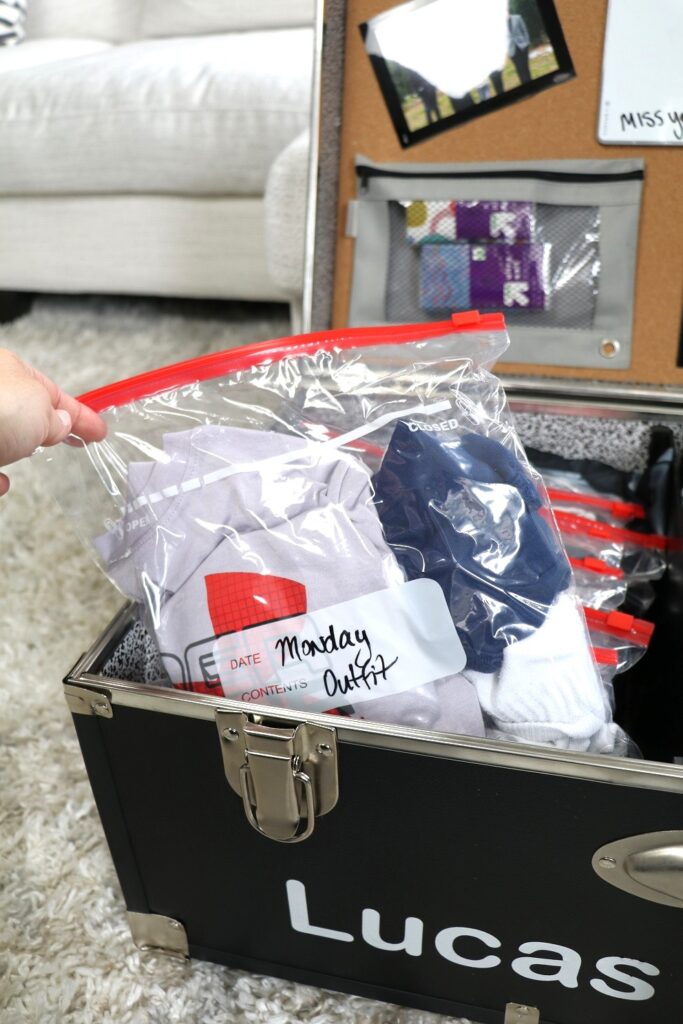
As you are packing you will want to label EVERYTHING! I mean do you really want them to lose their toothbrush on the first day?!? Name Bubbles are a must-have for labeling all your camper’s items. I love these because they are washable, sunblock, and bug spray proof. The labels really hold up on clothes, shoes, and even in the dishwasher. I also get these same labels for the start of school every year. Pro-packing tip is once you labeled their clothes, then divide each day into separate Ziploc bags so it will be easy for them to find.
PACKING LISTS
Basics:
- Sleeping bag & Pillow
- Sheet Set
- Pajamas
- Soap & Shampoo
- Lotion
- Toothbrush & Toothpaste
- Mouthwash
- Floss Picks
- Deodorant
- Comb/Brush
- Lip Balm
- Tissues
- Hand Sanitizer or Wipes
- Bath Towel & Washcloth (or Loofah)
- Beach Towel
- Shower Tote or Bucket
- Shower Shoes (Flip Flops)
- Insect Repellant
- Calamine Spray or Lotion
- Sunscreen
- Prescription Meds
- Flash Light
- Reusable Water Bottle
- Hat
- Poncho or Raincoat
- Sunglasses
- Bandanna/Scarf
- Small Backpack or Drawstring Bag for Day Trips
- Shirts and Long Sleeve Shirts
- Shorts and Pants
- Sweatshirt/ Jacket
- Swimsuit
- Googles
- Socks
- Underwear
- Gym Shoes
- Laundry Bag
- Mini First Aid Kit
- Drawstring Backpack
Extra Items:
- Comforts From Home Like Stuffed Animal
- Books/ Bible
- Deck of Cards
- Pre-addressed & Stamped Envelopes & Stationary
- Journal With Pen/ Pencil
- Empty Scrapbook with Markers
- Camping Stickers
- Spare Batteries
- Disposable Camera
- Extra Pair of Shoes and Extra Socks
- Plastic Ziplock Bag for Wet Clothes
- Swim Goggles
- Ponytail Holders/ Headbands
- Dress Clothes
- Bathrobe
- Nail Clippers
- Collapsible Cup
- Hydration Backpack
- Binoculars
- Family Photos
- Extension Cord
- Small Personal Fan (rechargeable)
- Portable Power Bank (recharge fan)
- Poster
- Hanging Bunk Organizer
- Snacks (If allowed)
- Night Light (Battery votive candle)
- Battery Powered Lantern
LUGGAGE
The day has come to pack up all these items. You can use a duffel bag, suitcase, or footlocker trunk. The trunk has been all the rage lately to send with your camper. You can even personalize the trunk for more fun. So let’s start with the DIY on how to make your own. You can purchase these from just about any of the big box stores. I found mine at Walmart and they had free two-day shipping. The trunks arrived in great shape after being shipped. Then the fun began!
DIY SUPPLY LIST
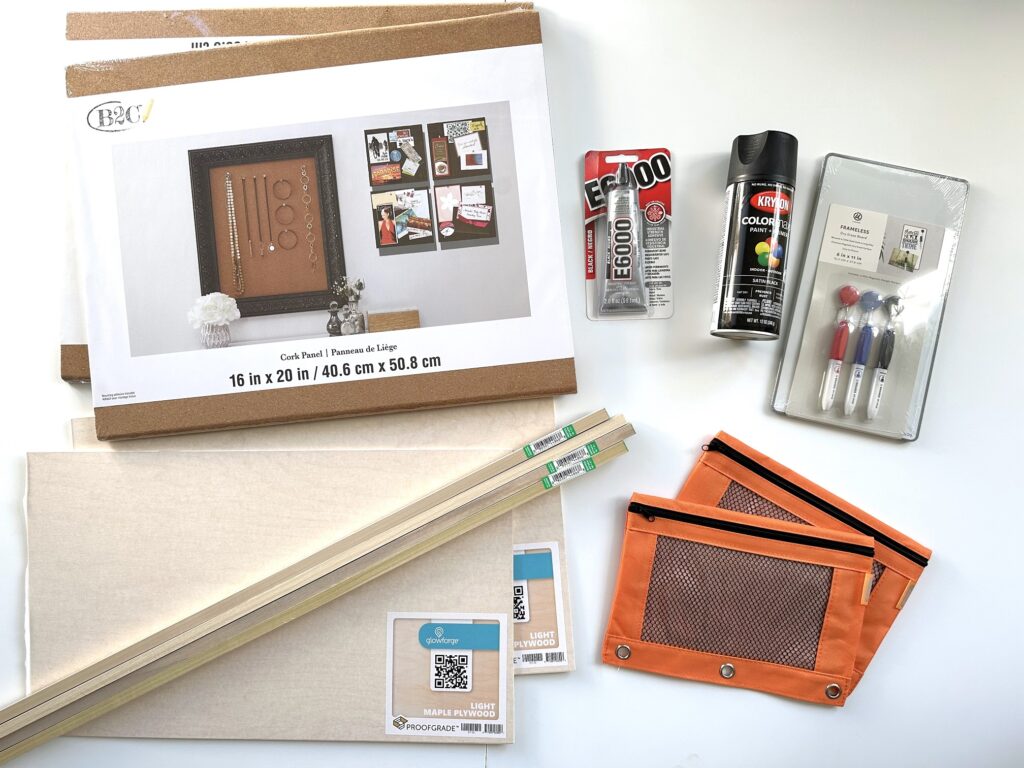
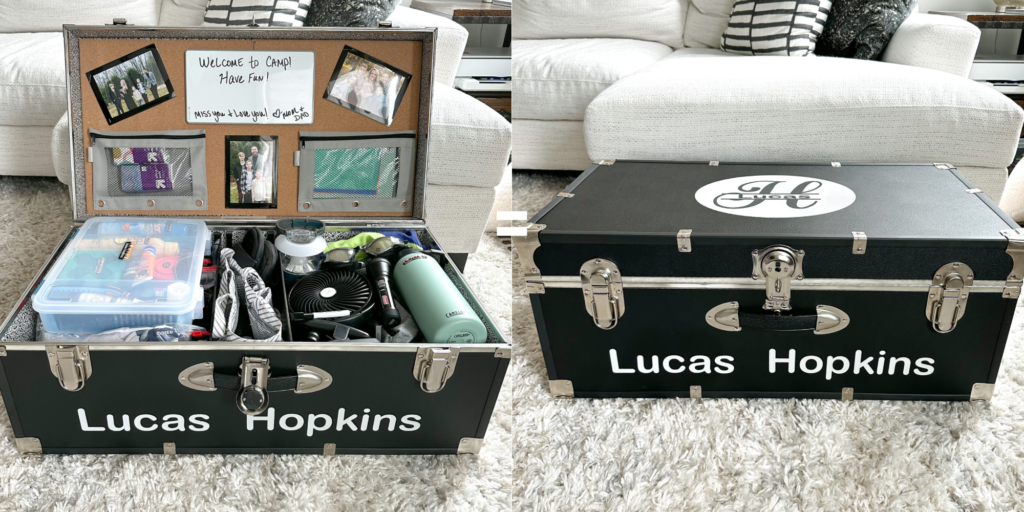
Supply List From Photo
- Cork Panel x 2
- E6000 Glue (Needs 72 hours to cure so don’t wait until the last minute)
- Spray Paint
- Basal Wood (1/2″ x 1/2″ x 36″)
- Craft Light Maple Plywood (1/8″ x 12″ x 24″)
- Binder Zipper Pouches
- Mini Dry Erase Board
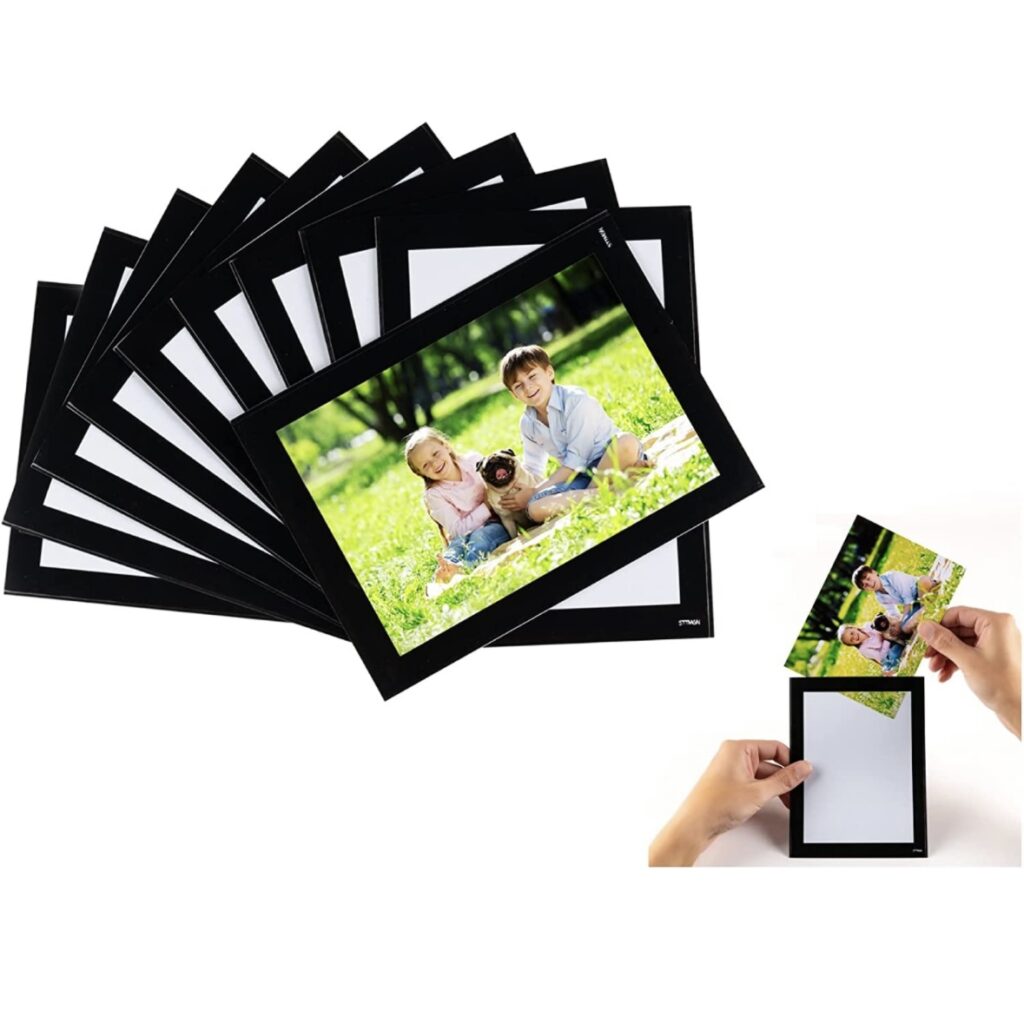
Other Items Not Pictured
- Magnetic Picture Frames
- Family Pictures
- Mirror (maybe for a girl footlocker)
- Permanent Vinyl
- Cricut or Silhouette Machine
STEPS TO DIY TRUNK
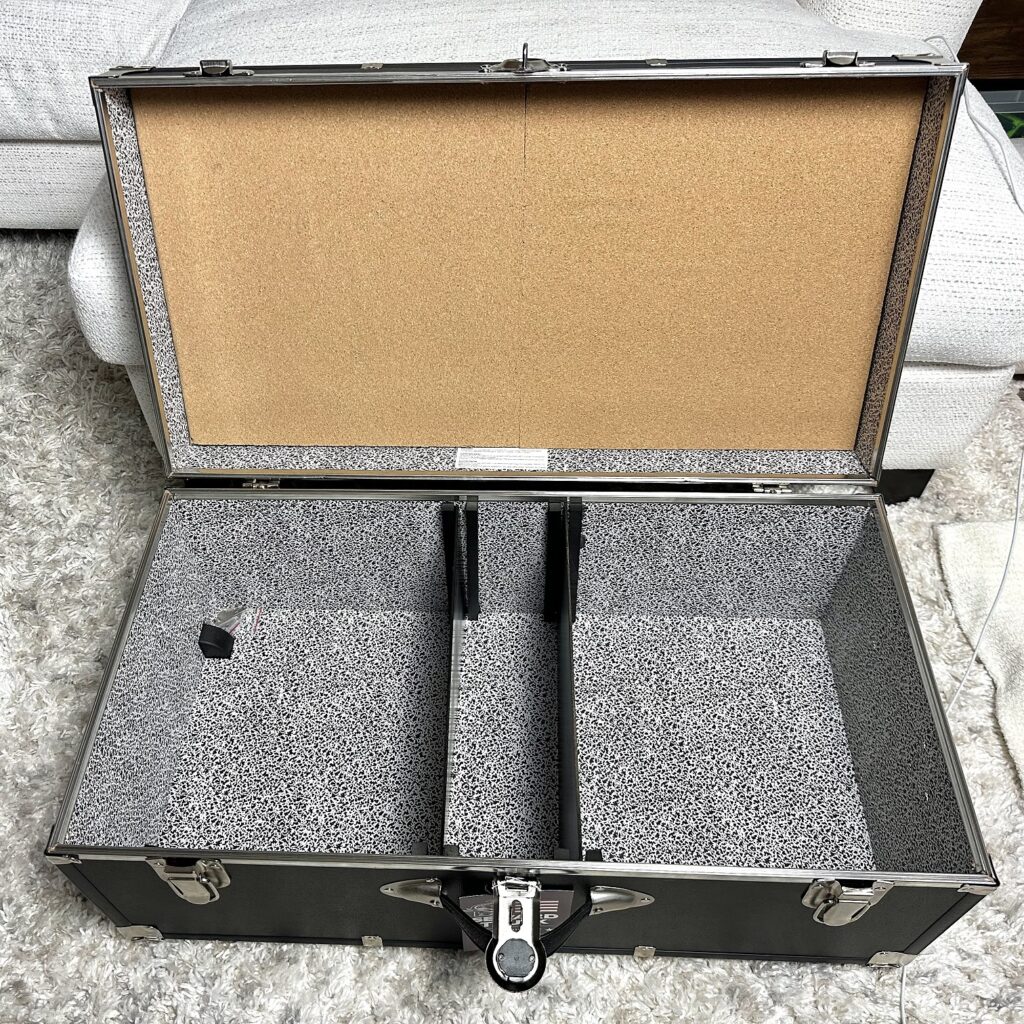
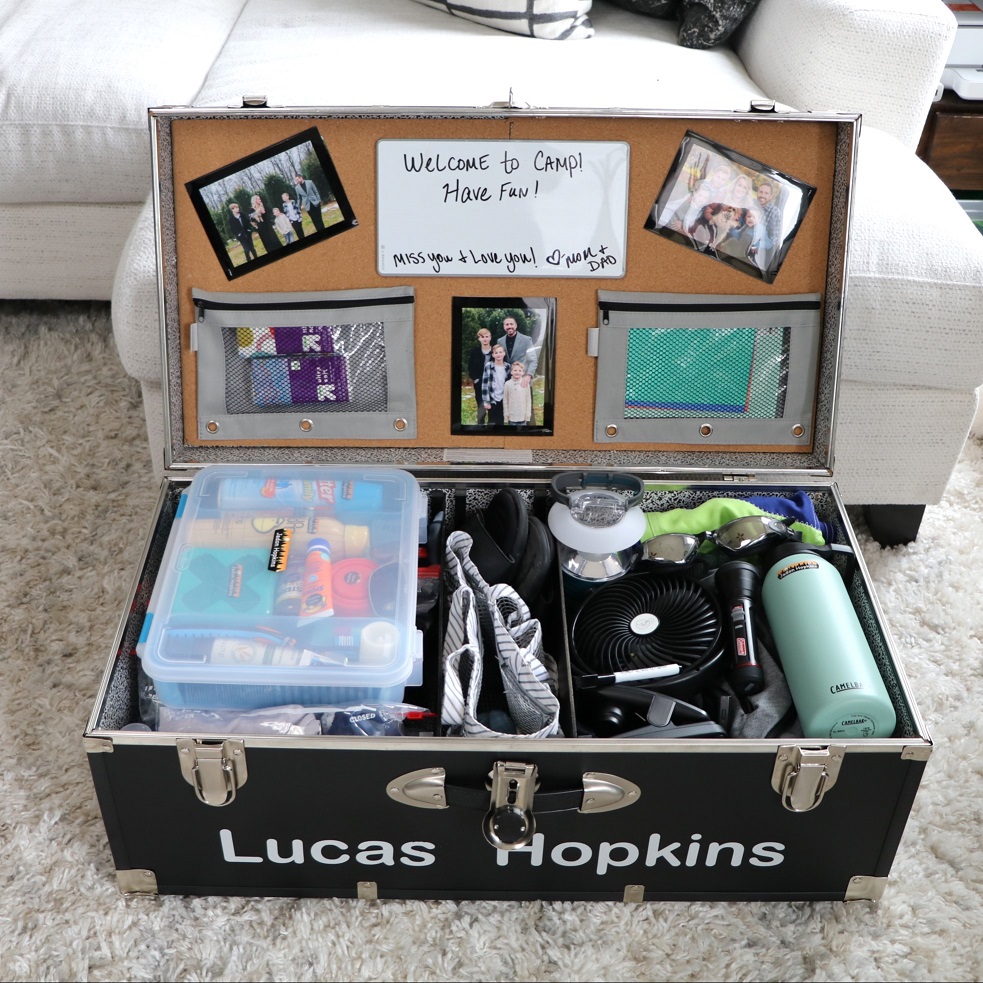
Once you got all the supplies, let’s start putting it together. Start by cutting the cork panels to fit inside the lid. Using the E6000 glue, glue the cork panels into the top of the lid. I would lay the lid flat on the floor with something heavy on it overnight to dry. Then the next day you can use the same glue to glue down your photo frames, dry erase board, mirror, and zipper pouches. Again, let this dry for several hours or overnight with something heavy on top. While that is drying, start cutting the wood pieces. We used a table saw to cut each piece. Remember to measure each piece twice and cut once to get the right fit. Then sand down the edges and apply spray paint. I applied two layers of spray paint. When the lid is dry, you can now glue the newly painted wood pieces down. I glued the small wood pieces to the sides and double checked the fit with the flat wood divider before letting it dry. The wood divider is left out while drying because you want the divider to be removable. I spaced out my dividers based on the size of the toiletry container. Check the dollar bin section for some cute camping items during the summer months. I needed each section to be wide enough on the sides to fit the plastic container and the middle was used for their shower tote/shower shoes/towel. You can organize the inside anyway you like.
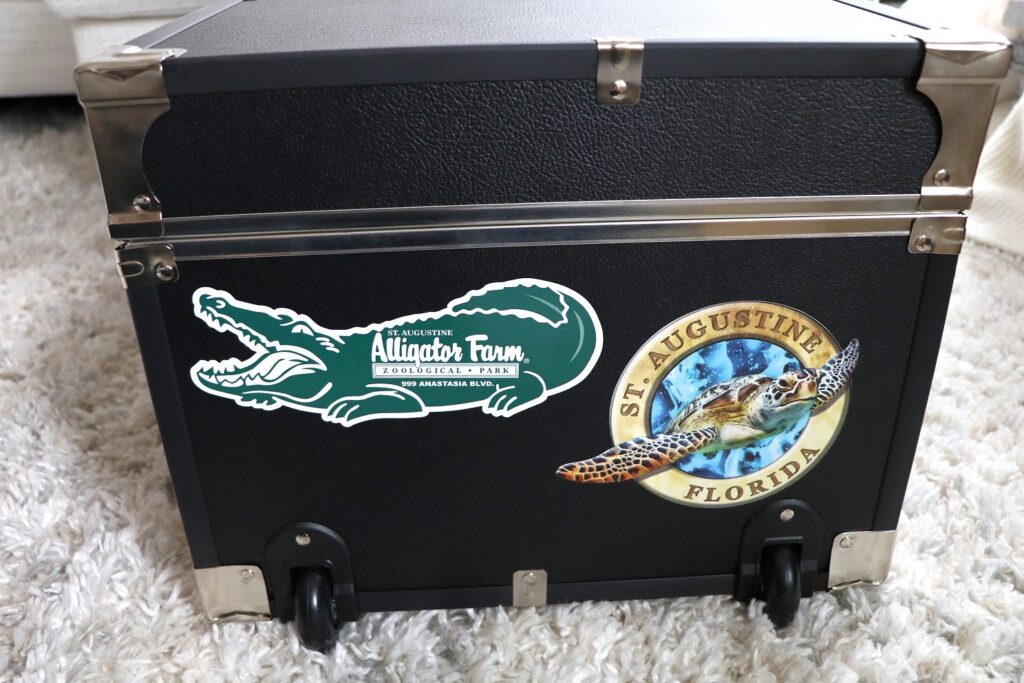
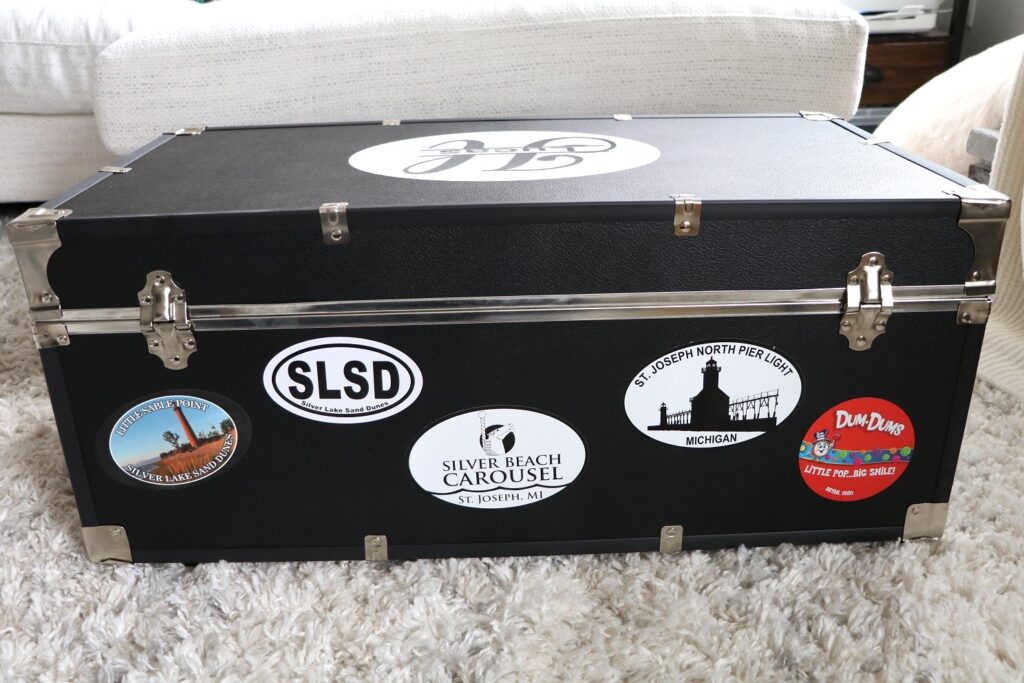
On the outside, I used my Cricut machine and permanent vinyl to create the personalized look. My design was pretty simple with a monogram on top and name on the side. The skies the limit on decorating. There are even people on Etsy who sell pre-made vinyl for you to apply. Not crafty? No problem, you can even purchase a trunk completely decorated on Etsy too. Who knew?? Finally for fun, we applied stickers to the sides of the trunk from each of their camping adventures and our vacations destinations.
REVIEW CONTENTS WITH CAMPER
Finally before you send off your camper, sit down with them and go through all the packed items especially if they didn’t help much. All the hard work will go to waste if they can’t find anything. This can be overwhelming for a young kid so take your time and explain how things might work like showering or bedtime.
Now they are ready for camp! I hope this helps make your camp preparations a little easier. Encourage them to document all the fun they are having so they can tell you all about it when they get home. They could even exchange addresses with a friend to gain a pen pal or two. Our last camp allowed me to write the boys emails and I took the opportunity to write daily. The camp also posted pictures online throughout the day. Technology is amazing these days! Please share your tips from your camping experiences in the comments below. I would love to hear them!