
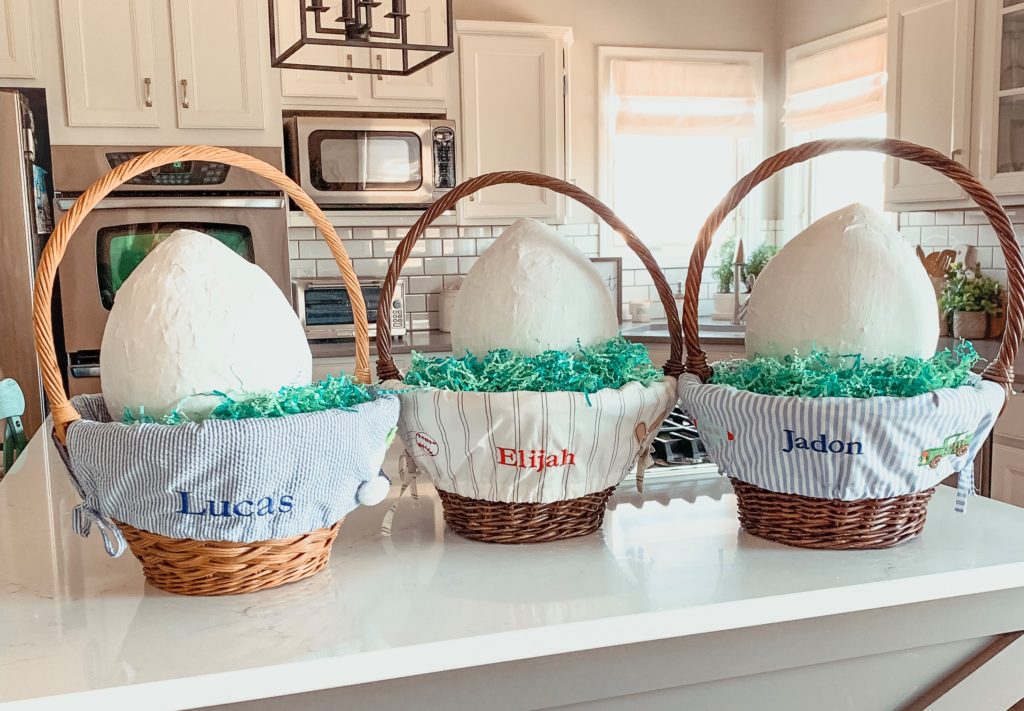
Spring is in the air! It is time to start thinking about all the exciting Easter traditions including colorful eggs, the Easter Bunny, an egg hunt, an Easter basket, going to church, and spending time with family. We incorporate all these and a couple more that we started a few years ago. One is a giant egg filled with all kinds goodies similar to a giant egg Piñata. The kids enjoy painting and decorating them but they love cracking them open on Easter morning!
Sound interesting but not sure what you will need or where to start? I will share a step by step guide to making your own paper mache Easter eggs for your kids next.
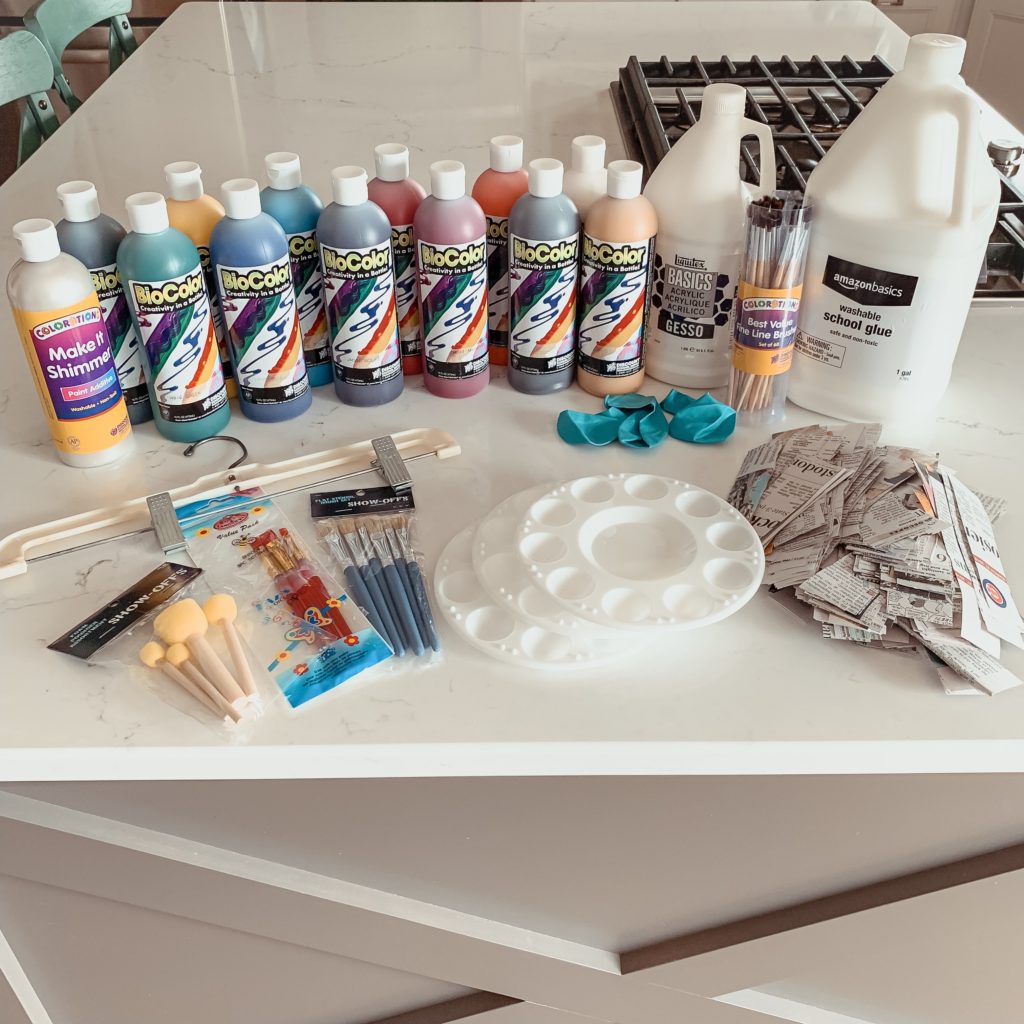
SUPPLIES
Surprisingly, you just might have most of the supplies that you will need already around the house. I added a few fun sponge painting tools with rollers that I found on Amazon. We are so excited to try them out!
- School Glue
- Balloons
- Newspaper (cut into long strips)
- Mixing Bowl
- Pants Hangers
- Gesso Acrylic Primer
- Washable Paint
- Paint Brushes & Shaped Foam Tool Set
- Paint tray
STEP 1:
Choose your paper mache method and start preparing the mixture. There are a few paper mache recipe variations that result in the same final product. One way is by mixing flour and water. Mix 1 part flour to 2 parts water. Another way is just using liquid starch, but it will take extra time to dry. The third way is using wallpaper powder. I have never tried using this but it is supposed to last longer. Mix 2 parts wallpaper powder and 1 part water. The easiest way we have found is using school glue. Mix 2 parts white glue and 1 part water into a mixing bowl.
Step 2:
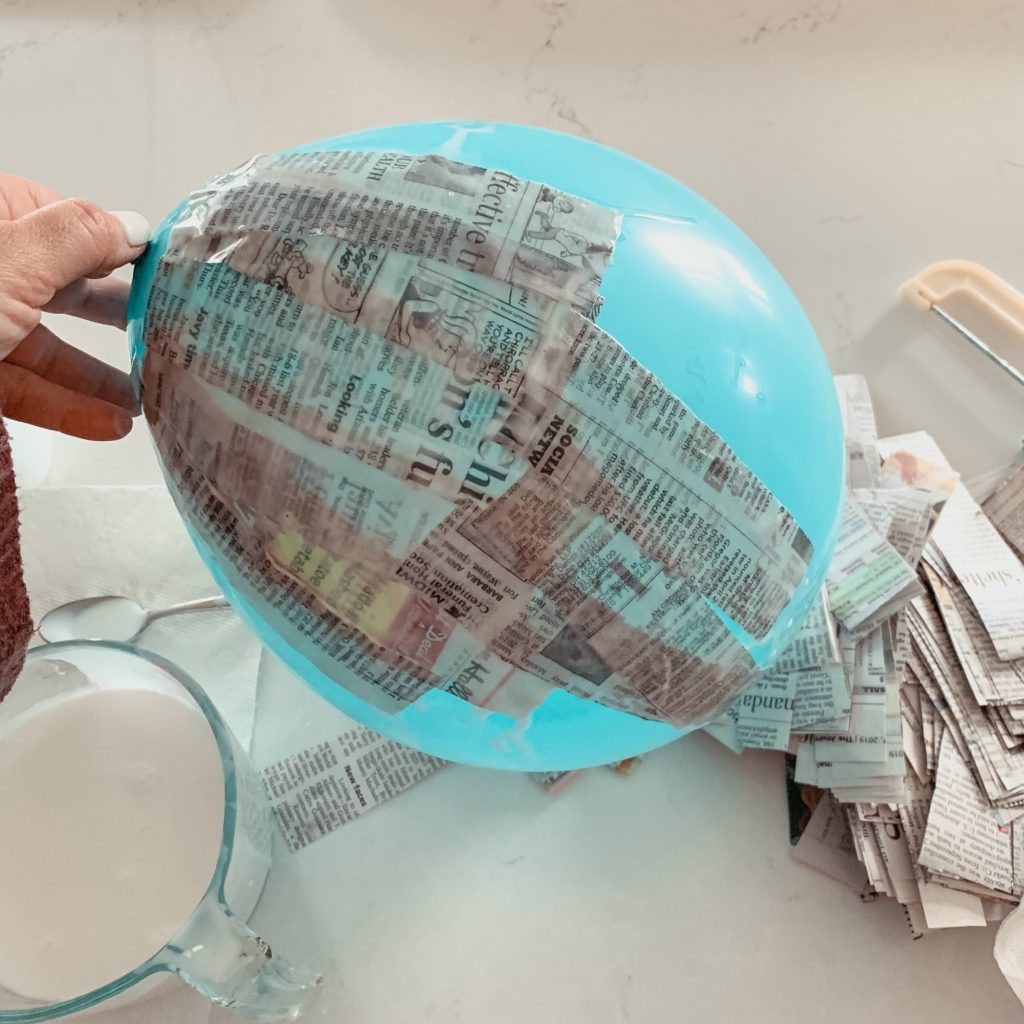
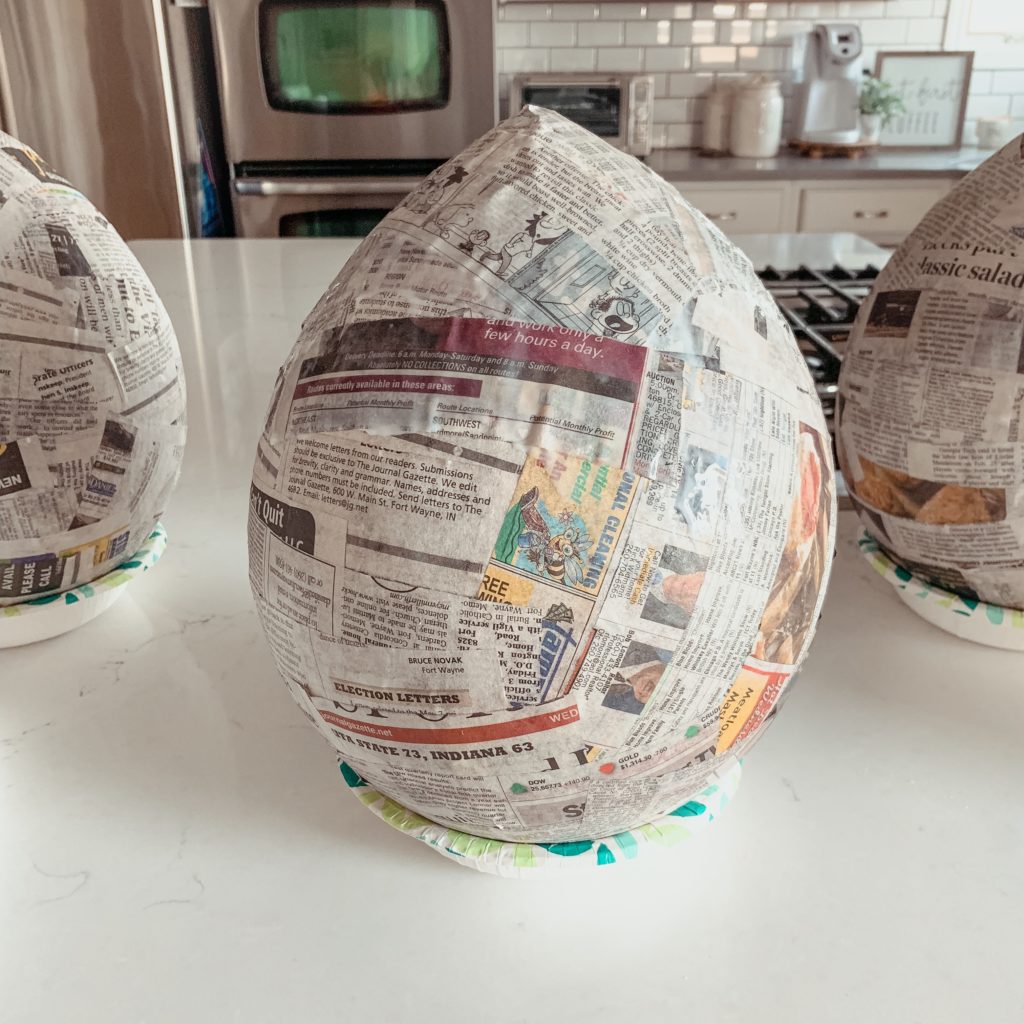
Blow up your balloon and start adding strips of newspaper. Dip each strip of newspaper into your glue mixture and remove the excess glue before applying it to the balloon. I run the paper across the edge of the bowl to remove the drips. You will want it saturated but not soaking wet. Too much glue can make the paper slide right off the balloon. Make sure to smooth out each piece as much as you can. You are aiming for a smooth surface to decorate.
Step 3.
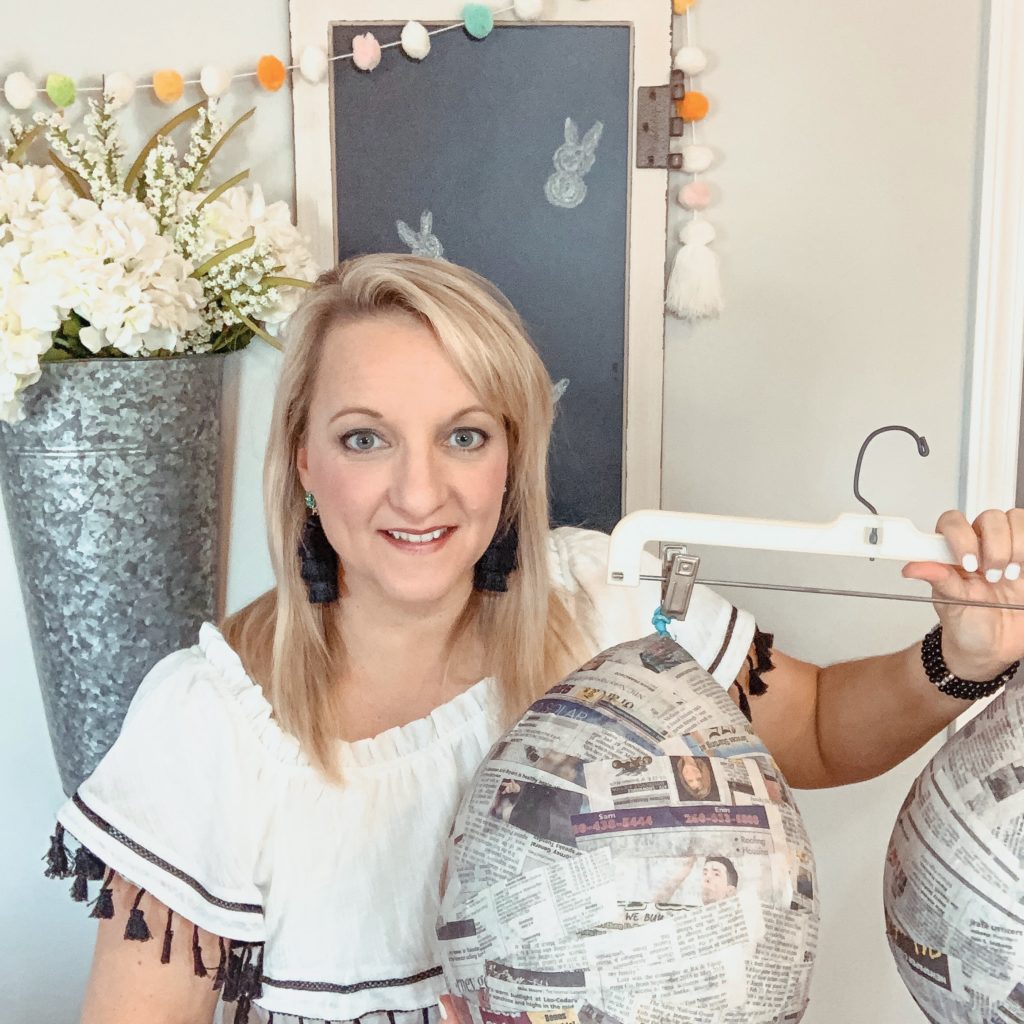
Repeat laying strips of paper to cover the entire balloon. Personally I let it dry by hanging on a pants hanger between layers, but you can add a second and third layer right away. Put your first layer on horizontally and the second vertically, and so forth. Save the extra glue mixture for a later step.
Step 4:
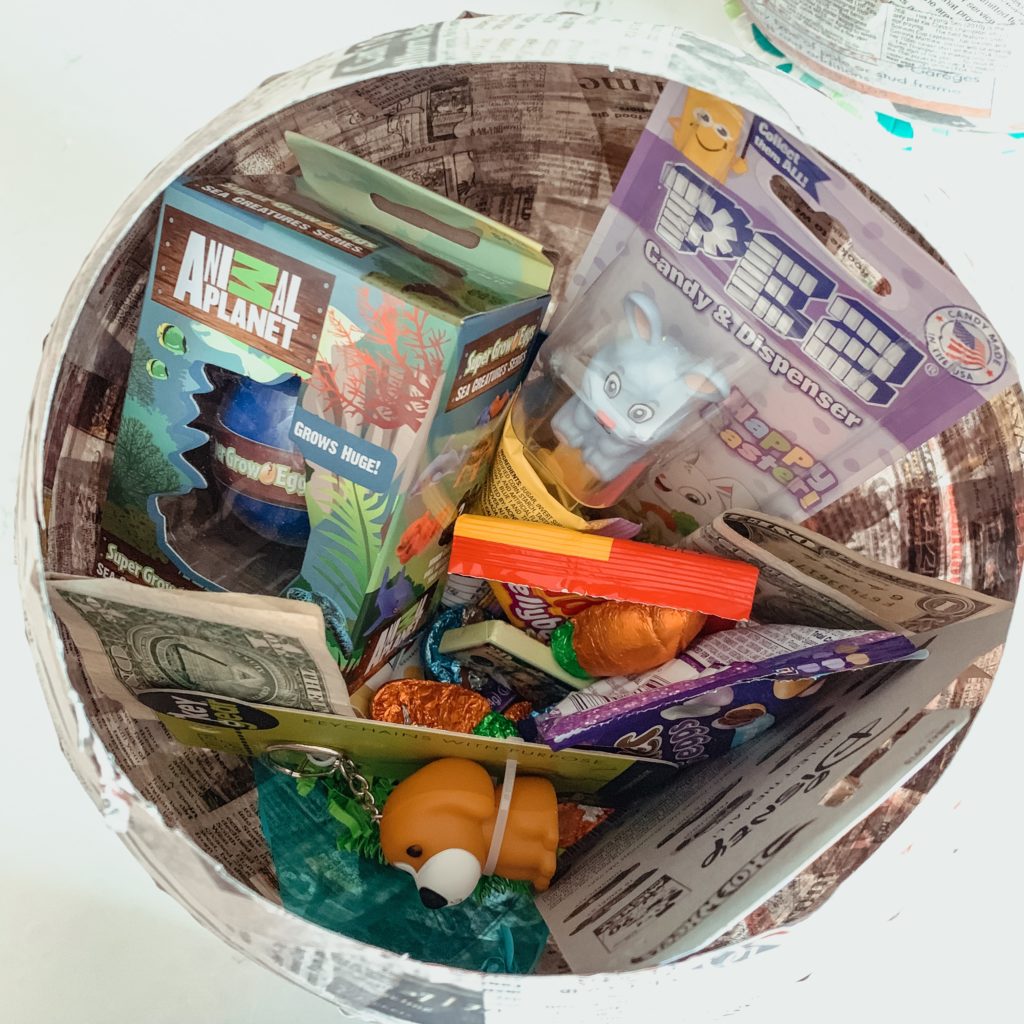
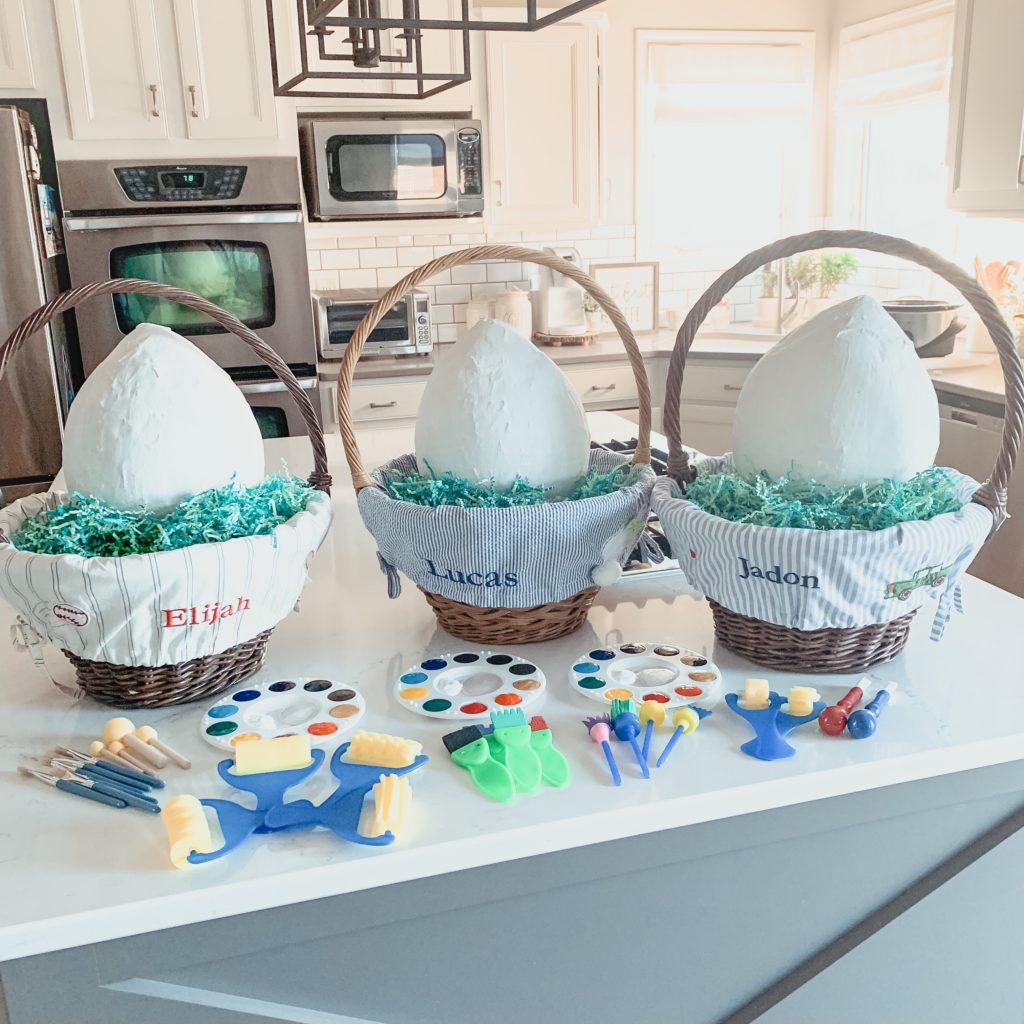
Allow the balloon to completely dry, before cutting the top open. Use scissors to remove the top off your egg while being careful not to damage the egg. Next gently remove the balloon from the inside. Finally, fill up the egg with some paper shred or Easter grass along with some fun toys and/ or candy. You can add anything you want here. Here is what we used to fill our eggs this year.

Step 5:
Reseal your egg with more paper mache. Carefully replace the lid back on top and add more paper mache to seal it back up. Try not to get it really wet as it will start to cave in.
Step 6:
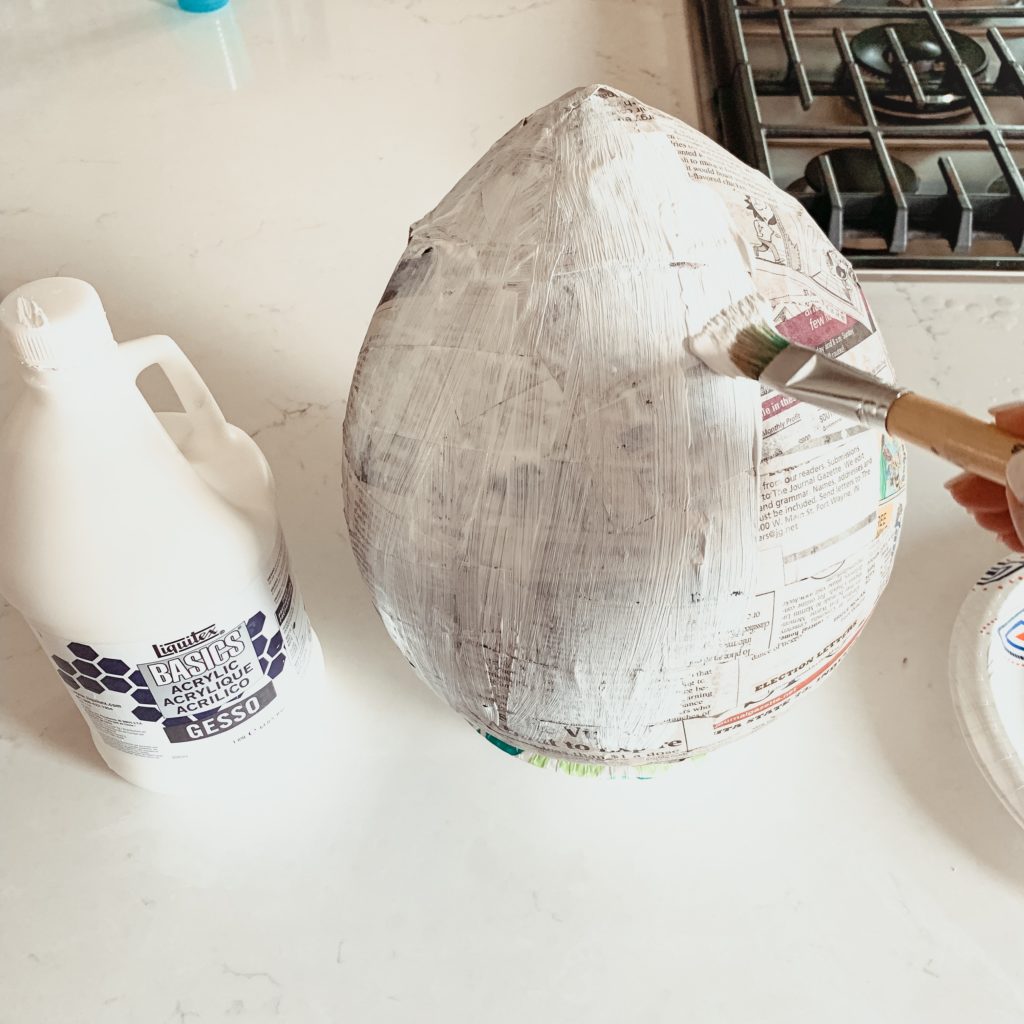
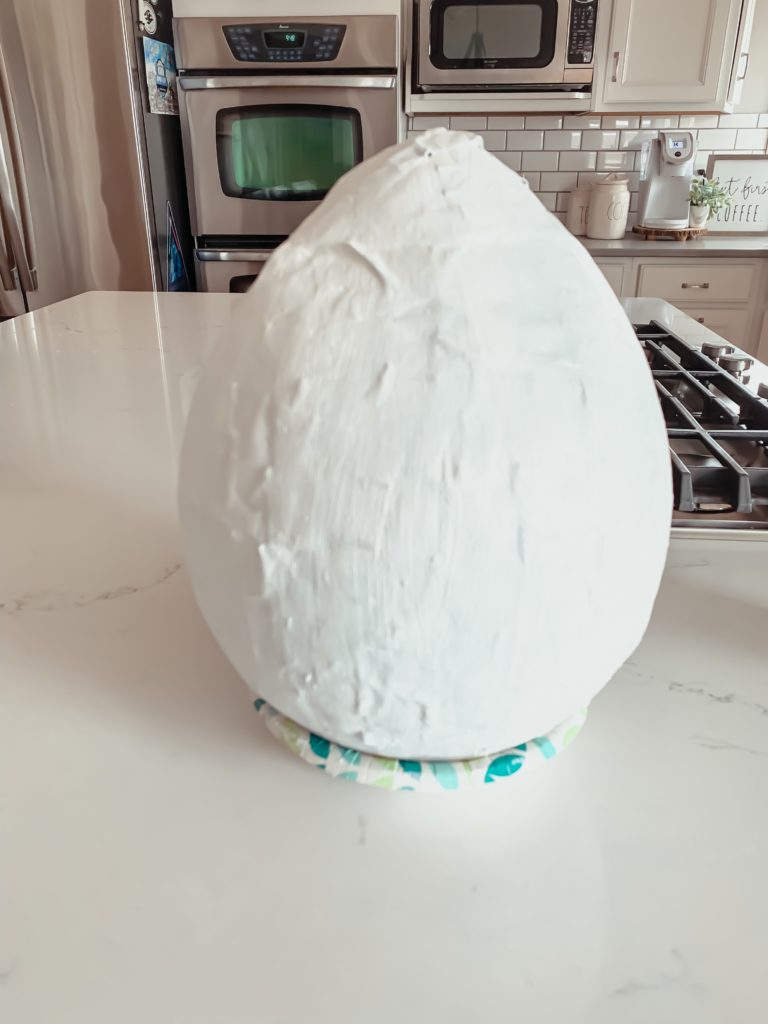
Once completely dry, paint on 2 coats of acrylic gesso. This will help make the egg more sturdy and get it ready to decorate. Gesso is a thick white primer that seals, stiffens, and makes a white base on the egg.
Step 7:
Start decorating the eggs as desired. My boys love this part because they get to let their imagination run wild. We love Biocolor paint from Colorations. It comes in a large variety of colors including metallics like gold and silver. The paint also leaves a eggshell like finish. When the boys are done decorating, they are so proud of their finished product and can’t wait to show everyone.
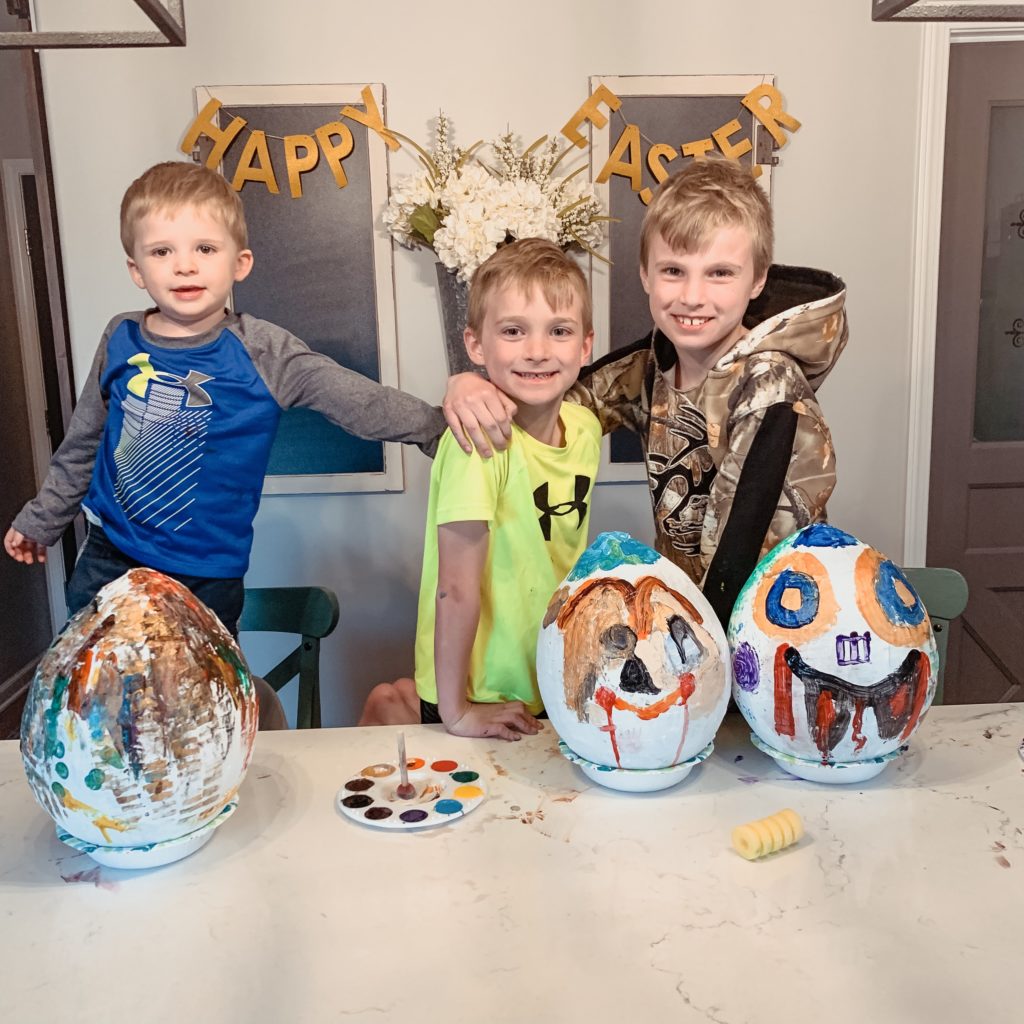
We place the finished eggs in or near their Easter baskets on Easter morning. They have so much fun deciding the best way to crack open their eggs to reveal the treasures inside. What traditions do you do for Easter? Comment below so we can try new ones too.

One thought on “Giant Paper Mache Easter Eggs”